After years of anticipation, Apple officially announced at WWDC 2020 that they were beginning the transition of the entire Mac lineup to the ARM architecture. Since then I had been itching to get my hands on one, but the MacBook Air and 13-inch MacBook Pro with the M1 chip did not fit the bill. I was waiting for that long-rumored all-new MacBook Pro.
Fast forward one and a half years later to January 2022, my wait was finally over!
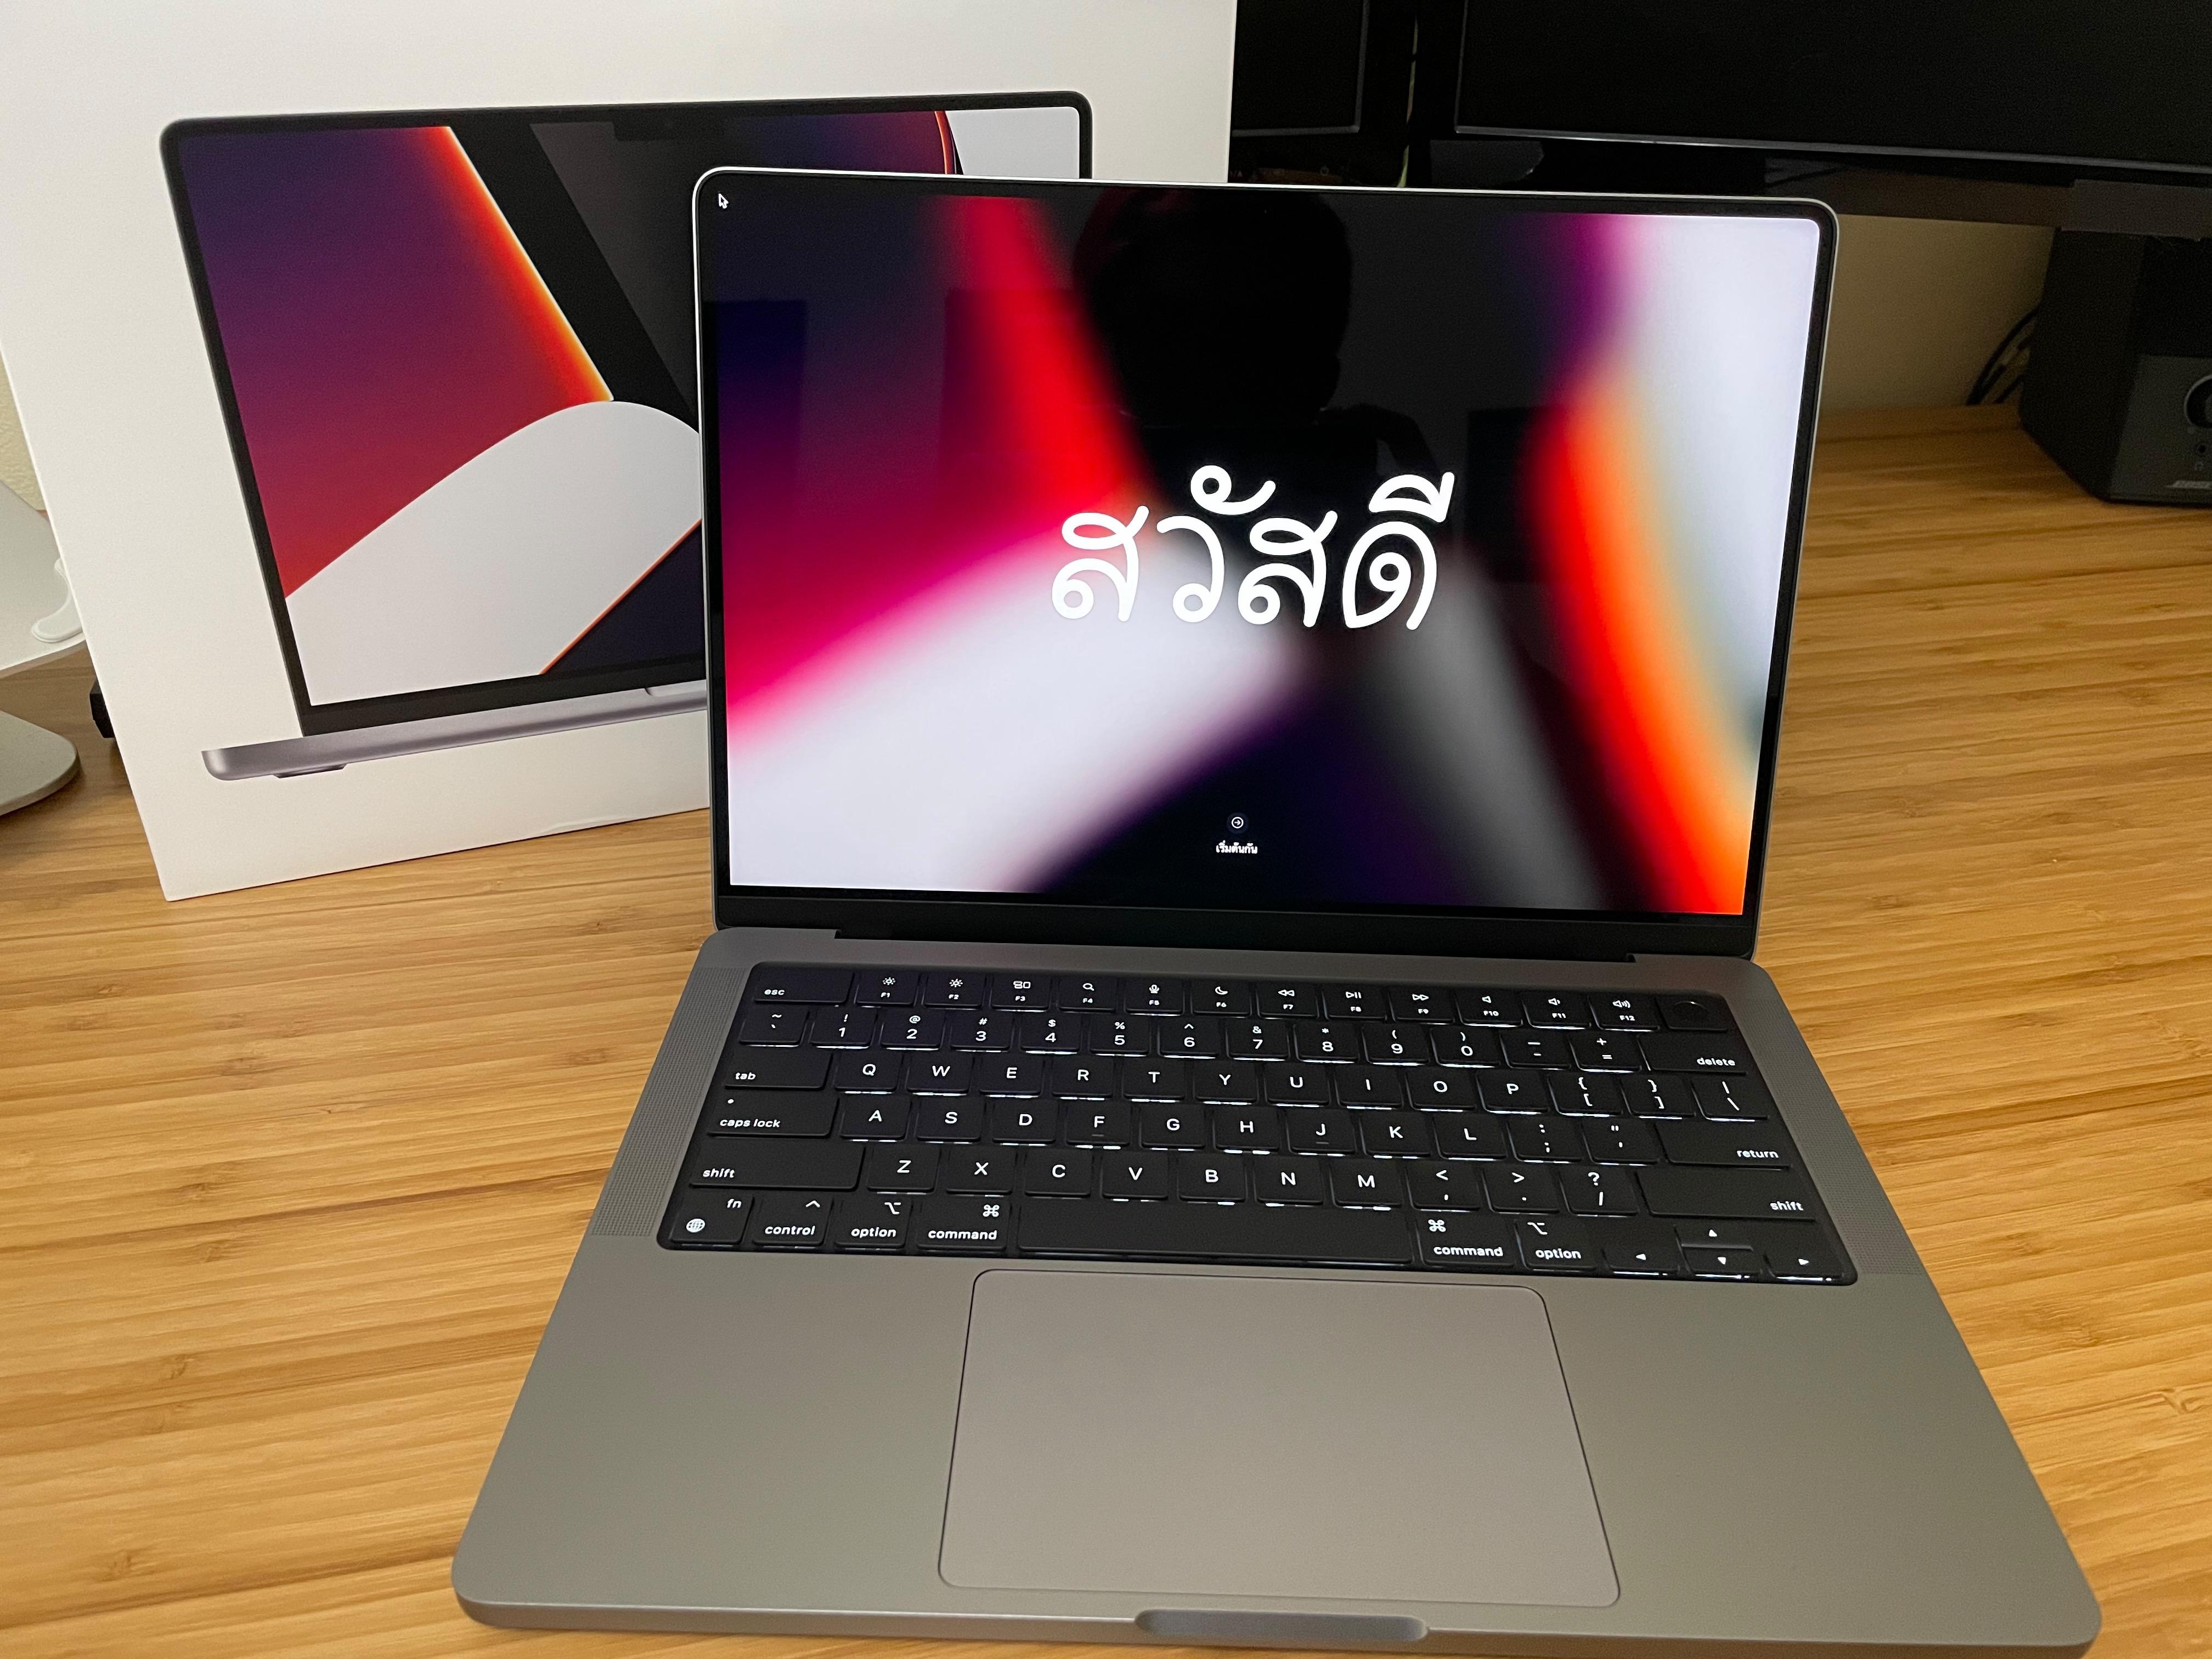
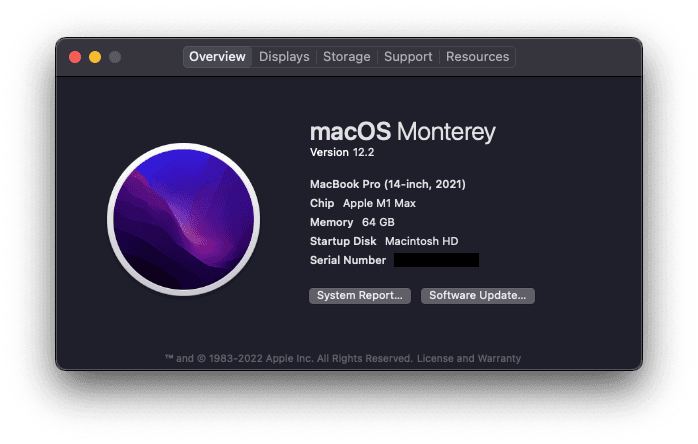
The configuration: 14-inch MacBook Pro with M1 Max with 10-core CPU, 24-core GPU, 64GB of RAM, and 2TB SSD. I upgraded to the M1 Max for the 64GB RAM option as I don't have the need for that much GPU performance which is also why I didn't max out to the 32-core GPU option. The extra memory bandwidth is a nice perk, but I doubt it would be that useful to me.
I was originally going to get the 16-inch model, having only ever owned the 15-inch models in the past. But at 2.2 kg (4.8 lbs) compared to 1.8 kg (4 lbs) of my 2017 15-inch MacBook Pro, it would be too heavy for me on the rare occasions that I need to bring it somewhere. And since most of the time I run it docked at my desk connected to external monitors, I figured I could get by with the smaller 14-inch model. On paper, the screen is only an inch smaller than the one it's replacing anyway.
Don't get me wrong, this 14-inch MacBook Pro is still plenty heavy for a small laptop at 1.6 kg (3.5 lbs), almost as heavy as my old 15-inch.
The Migration
Transferring everything over from the old machine instead of setting this one up brand-new is definitely the way to go. I didn't want to have to spend time reconfiguring it from scratch with all the files, applications, and countless settings.
Everybody else seems to have no issue whatsoever with the Migration Assistant these days, but it ended up not being as painless as I was hoping for.
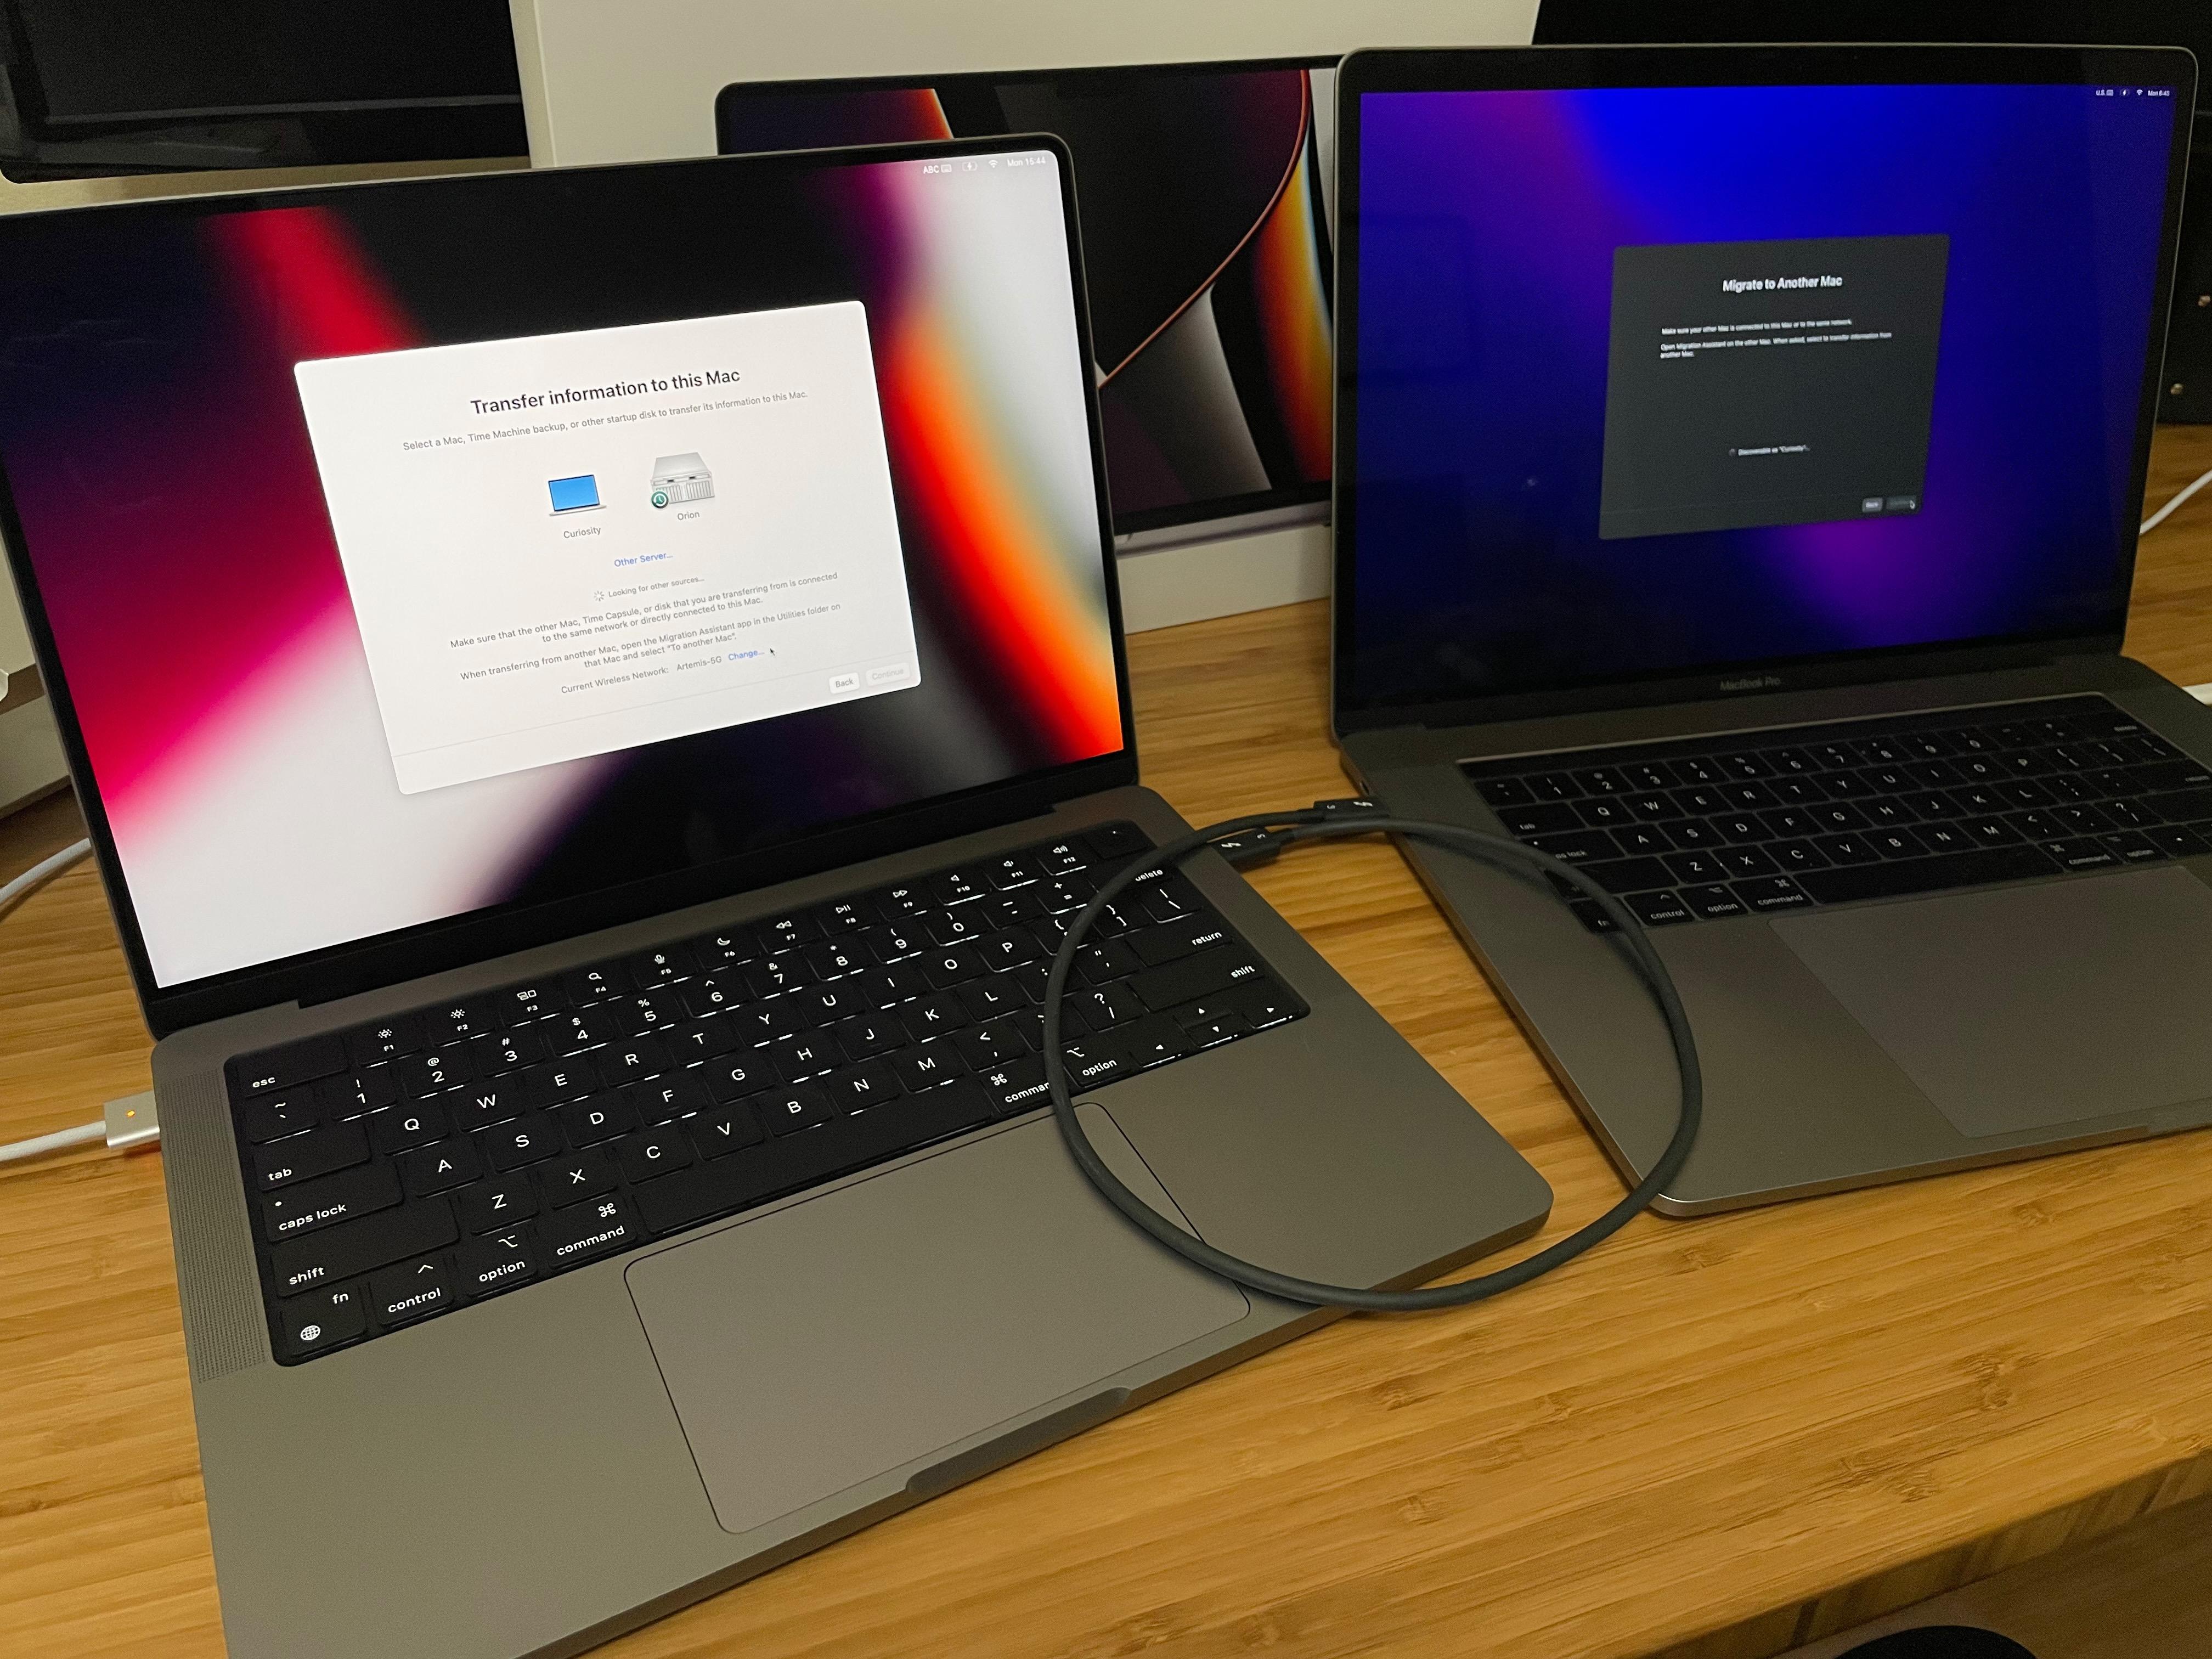
With these two connected to each other using the Thunderbolt 3 cable that came with my CalDigit TS3 Plus dock, at first the Migration Assistant refused to use the wired connection and instead insisted on using the wireless "Peer-to-Peer" connection. I definitely was not going to let it transfer the data wirelessly as I knew that was going to be flaky. Here's what I ended up doing in trying to get them to use the wired connection:
- Turned off Firewall on both machines
- Made sure both Macs were on the same latest macOS Monterey 12.1 (at the time)
- Turned off Wi-Fi on both machines (I don't think this this mattered)
- Made sure in the Network preference pane that they could detect each other via Thunderbolt
- As a desperate attempt, erased all contents and settings on the new Mac and reinstalled macOS (also don't think this mattered)
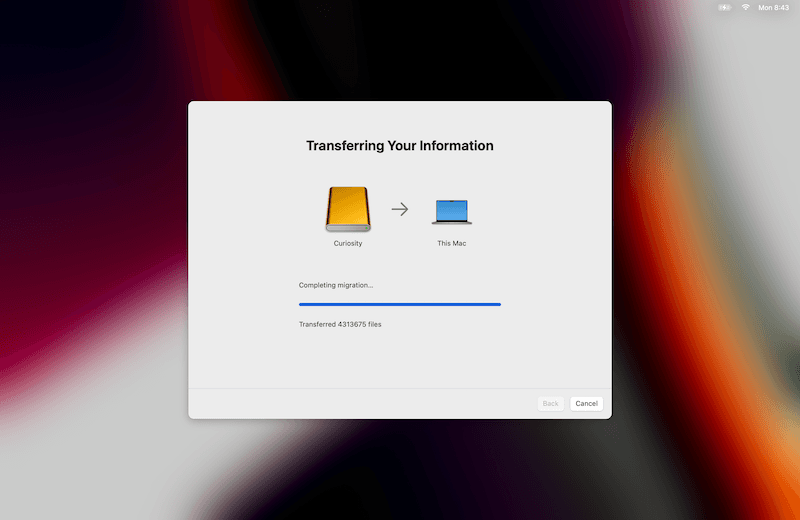
The final thing I tried—and what I should have done from the beginning—was to put the old Mac in Target Disk Mode. Right away, the Thunderbolt connection showed up so I began the transfer.
My old 2017 Mac used up about 440GB so there wasn't that much stuff to move over. I was hoping that I would see around 200MB/s transfer speed and that this process wouldn't take more than 45 minutes to complete. But to my bewilderment, it wouldn't transfer more than on average 50MB/s with a lot of time spent with less than 10MB/s. It also peaked at only 70MB/s. I quadruple-checked that the cable I used was in fact a Thunderbolt 3 cable. Having already spent too much time and energy going in circles trying to get the wired connection to work, I cut my losses and just let it do its thing, hoping that maybe it would speed up (it never did). I had already waited 18 months for this, surely I could wait a couple of hours more.
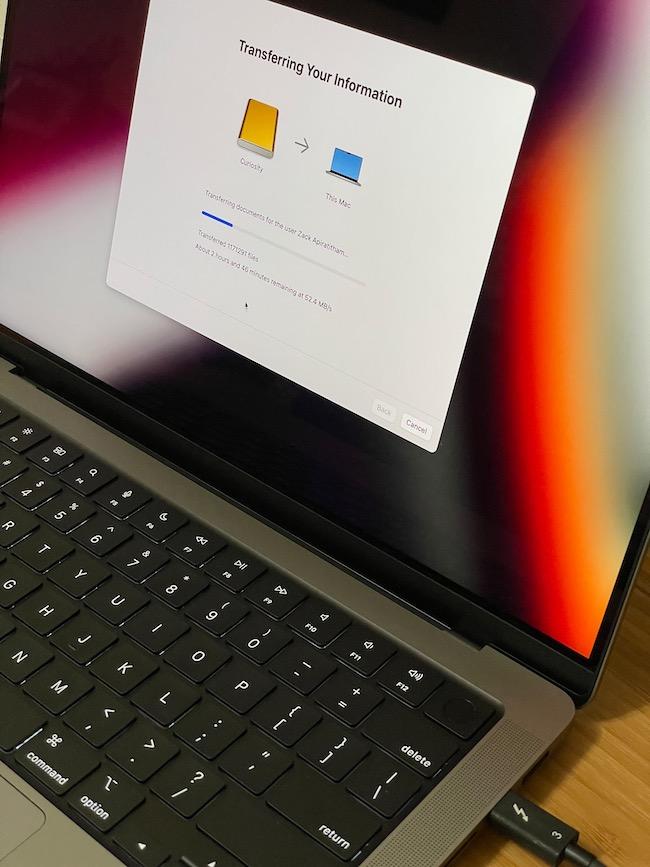
In the end, it took almost three hours to complete the transfer of over four million individual files.
General Observations
I do love the hardware design of this model; it has somewhat of a retro look to it, reminding me of the titanium PowerBook G4. The "MacBook Pro" etching on the back is a really nice touch. I also don't mind that it's thicker.

Since the 14-inch one can be configured all the way up just like the 16-inch, I figured I could save some money just getting the smaller size without having to compromise on the specs I want. And as I alluded to earlier, the screen doesn't feel that much smaller than my 15-inch one.
In a little over a month that I've been using it, I didn't run into any compatibility issue (that I could tell) with this being on a completely new architecture; Rosetta 2 is doing a fantastic job translating x86 to ARM. What an amazing feat of engineering that is.
I never had an Apple desktop computer and only ever used MacBook Pros. In all those years, I've gotten used to hearing the fans spinning up when doing anything remotely computational intensive (or even randomly). But now I've discovered the pleasure of working at my desk without that incredibly obnoxious fan noise. It is an absolutely blissful experience.
The notch was no doubt an unexpected feature with this redesign. I'm choosing to look at it not as a protrusion into my screen, but as extra screen real estate extending up to the very edge. Plus I think macOS is the perfect operating system to have to support this quirk since the menu bar, which is the fundamental part of the Mac, is already always at the top. I can't imagine how they would even support this on Windows (not that Apple's support for this was anywhere near perfect).
This also gave us a couple of fun apps like Notchmeister and NotchCam.
I wish this notch included the Face ID sensor. There's no reason why macOS wouldn't be able to support it since it's using pretty much the same chip as the iPad Pro which comes with Face ID. My guess is that they probably don't have the room to fit it as the screen lid is unbelievably thin whereas the iPhone and iPad Pro do have quite a bit more thickness to accommodate it.
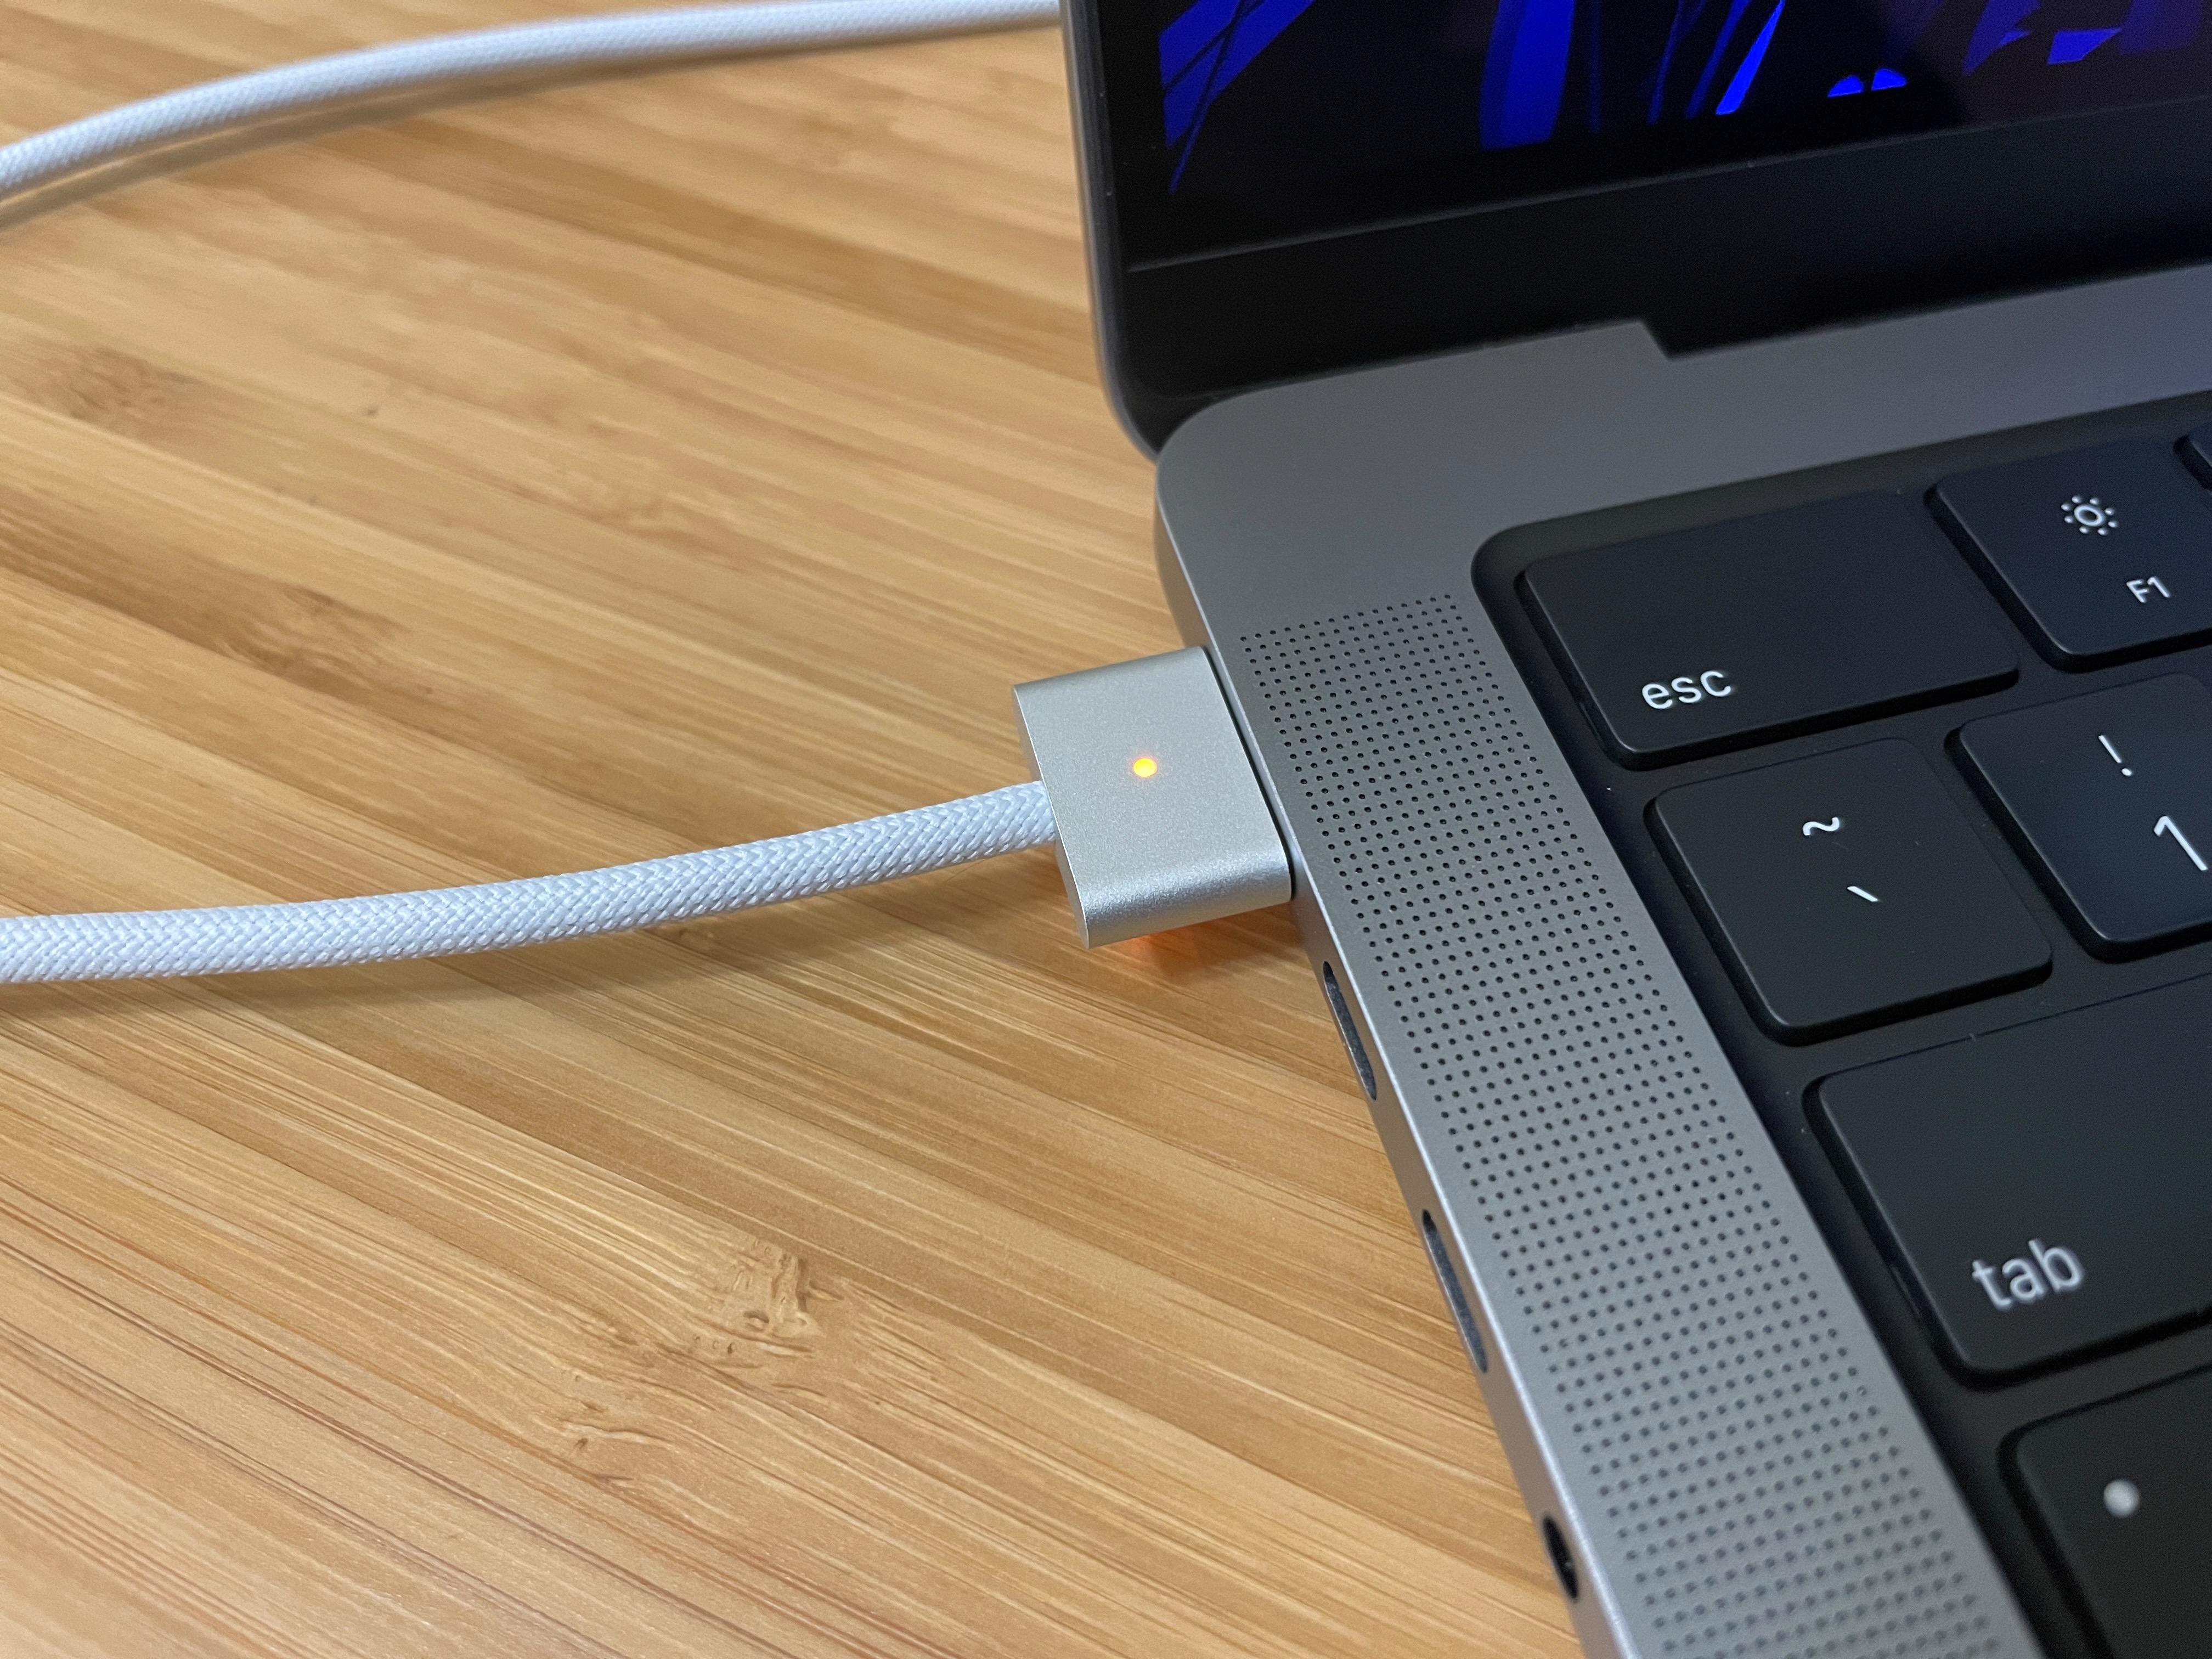
This generation of MacBook Pros also sees the triumphant return of the beloved MagSafe connector. I can look past the mismatched color, but it would have been nice if they matched. I really do love the braided cable that comes with it though.
The interesting part about this is that the magnet is significantly stronger than the MagSafe connector I remembered from my 2010 MacBook Pro. Yanking it straight out is pretty much impossible as it's really on there. But pushing it at an angle up or down pops it right out. It definitely still functions as intended, as somebody tripping on the wire would almost certainly not going to be pulling it straight out. Nevertheless, I still feel like this is a slight regression from the old MagSafe we had.
Also props to Apple for still allowing charging via the three Thunderbolt ports because being able to charge on either side is definitely a big win.
Good riddance to the butterfly keyboard. These new keys do feel mushier but in a good way. They definitely provide a much better experience to type on, and more reliable too.
I never found the Touch Bar all that useful since I rarely used the built-in keyboard. As much potential as it may have had, Apple clearly did not want to invest in it, seeing that since its introduction in 2016 they did not make a single improvement to it. Unexpectedly, I did find myself missing it when I was filling out forms and not being able to quickly tap to autofill the fields. But other than that, I don't miss the Touch Bar.
With the Touch Bar gone, this means we now have back the physical escape key! No longer do I need to remap my escape key to the caps lock key to make it touch-typable. The inverted-T arrow keys are another greatly-missed affordance for touch typing and I do very much welcome their glorious return.
Performance Tests
I ran some tests to find out for myself how much faster this thing is. For comparison, my 2017 15-inch MacBook Pro came with the 2.9GHz quad-core i7, 16GB of RAM, and AMD Radeon Pro 560. The numbers are averages of multiple runs I did for each of these tools.
Xcode
I am rewriting Liftoff in SwiftUI so these tests were run using this fairly small project. Each after cleaning the build folder, of course. The build times came from Xcode directly, thanks to this neat trick (via ATP):
defaults write com.apple.dt.Xcode ShowBuildOperationDuration YES
M1 Max: 10s
Core i7: 25s
Delta: 2.5x faster
Node.js (via Gatsby)
This was conducted using this very site with the gatsby build command with Node version 16.13.1.
M1 Max: 1m 5s
Core i7: 1m 34s
Delta: 1.4x faster
Flutter
Flutter still doesn't support Apple Silicon natively so the performance improvement seen here is not the most we could have gotten out of it. With this I'm running flutter build ios with flutter clean before each run.
M1 Max: 2m 18s
Core i7: 7m 25s
Delta: 3.2x faster
This test was the first time that I heard the fans on this machine, which kind of disappointed me a little to be honest.
Lightroom Classic
This was conducted on the Apple Silicon version of Lightroom Classic (v11.1). From my understanding, Lightroom doesn't really take advantage of the GPU when importing or exporting photos. But it appears to mostly be using it for displaying and processing the images. So the advantage of the M1 Max here would be around previewing and applying edits to photos, unfortunately not something that I could quantitatively measure and compare.
For import, I used 100 raw 20-megapixel photos taken on the Canon EOS 6D. There were three options enabled:
- Copy as DNG
- Build 1:1 previews
- Apply lens correction
This also resulted in the fans going at full speed from what it sounded like.
M1 Max: 2m 53s
Core i7: 6m 42s
Delta: 2.3x faster
For export, I have a recent project with 44 raw 20-megapixel photos, all with various edits and color corrections. The export files were 80% JPEGs and no image resizing was done. The fans did not spin up for this.
M1 Max: 46s
Core i7: 2m 37s
Delta: 3.4x faster
Some Annoyances
My setup is through the CalDigit TS3 Plus dock connected to two 1080p monitors: one via Thunderbolt → HDMI and the other via DisplayPort → HDMI. While the connection and windows rearranging are almost instantaneous, the majority of the times only one of the monitors would display anything. The one connected via DisplayPort is the troublesome one as it rarely ever works. Every time I connect the laptop to the dock, I also have to reach back and reconnect the DisplayPort on the dock. And even that doesn't always work on the first try either, I frequently have to try multiple times for both monitors to be displaying properly.
This is clearly something specific to the M1 as this was rarely ever an issue with the Intel laptops with the exact same setup. Perhaps it's some sort of driver issue. The recent macOS 12.2 update did not improve the situation either. I think I'm going to have to try swapping out these cables to see if that helps.
What makes this all the more annoying is that it wouldn't be a problem if I had an Apple-made monitor connected to my Mac. I keep these stupidly bad monitors around because there are no good retina external monitors in the market to replace them with. This is a huge gap in the lineup that should have been addressed years ago.
This is not unique to the M1 model but there's one tiny UI issue that has been bugging me since I updated to Monterey. In the menu bar, I want hide the stock clock menu item as I prefer to use the one from iStats Menus. Unfortunately, there's no way for me to completely remove the clock so the next best thing I could do was to change the digital time to be an analog clock so that it would take the least amount of space at the very right edge of the menu bar.

Do you see what I'm seeing? The clock icon is clipped on the top and right side by just a pixel! Every time I look at the time and glance up to that top right corner of the screen, I'm greeted with this badly-rendered clock icon. It's worth noting that this is only visible on external monitors and not the built-in screen. I'm actually not sure how long this has been there. Maybe it's been around since the big redesign they did with Big Sur in 2020. Either way, I filed a bug report (FB9886279) so hopefully this will get fix in a future release.
Final Thoughts
Despite those complaints, I do love this machine. After long dark years of disappointing MacBook Pro lineup, what we now have is truly great and truly pro. It's not lost on me that I'm celebrating getting back what they took away from us in 2016. But it is more than just that: the M1 Max is a powerhouse, the Liquid Retina display is stunning, and the overall industrial design is just gorgeous.
With the modular 2019 Mac Pro, the redesigned Siri remote, and now the 2021 MacBook Pro, Apple showed that they do listen and are willing to give us what we want. The trend has been very encouraging in recent years. My only hope now is that they heard us begging for an external monitor that doesn't cost six grand. I'm cautiously optimistic that this year might be the year.